Home: see what needs you
Open Home from the sidebar for a board of waiting, running and recently used lanes, with headlines drawn from each agent's last message.
Choose a lane to move straight into its workspace.
v0.10.1 · desktop app, plus a terminal UI
Claude Code and Codex. Multiple repos. One local workspace: triage your fleet from Home, steer agents in Chat or Terminal, and keep sessions alive across app restarts.
Prefer the terminal? repomon is a first-class TUI too, same fleet, same daemon.
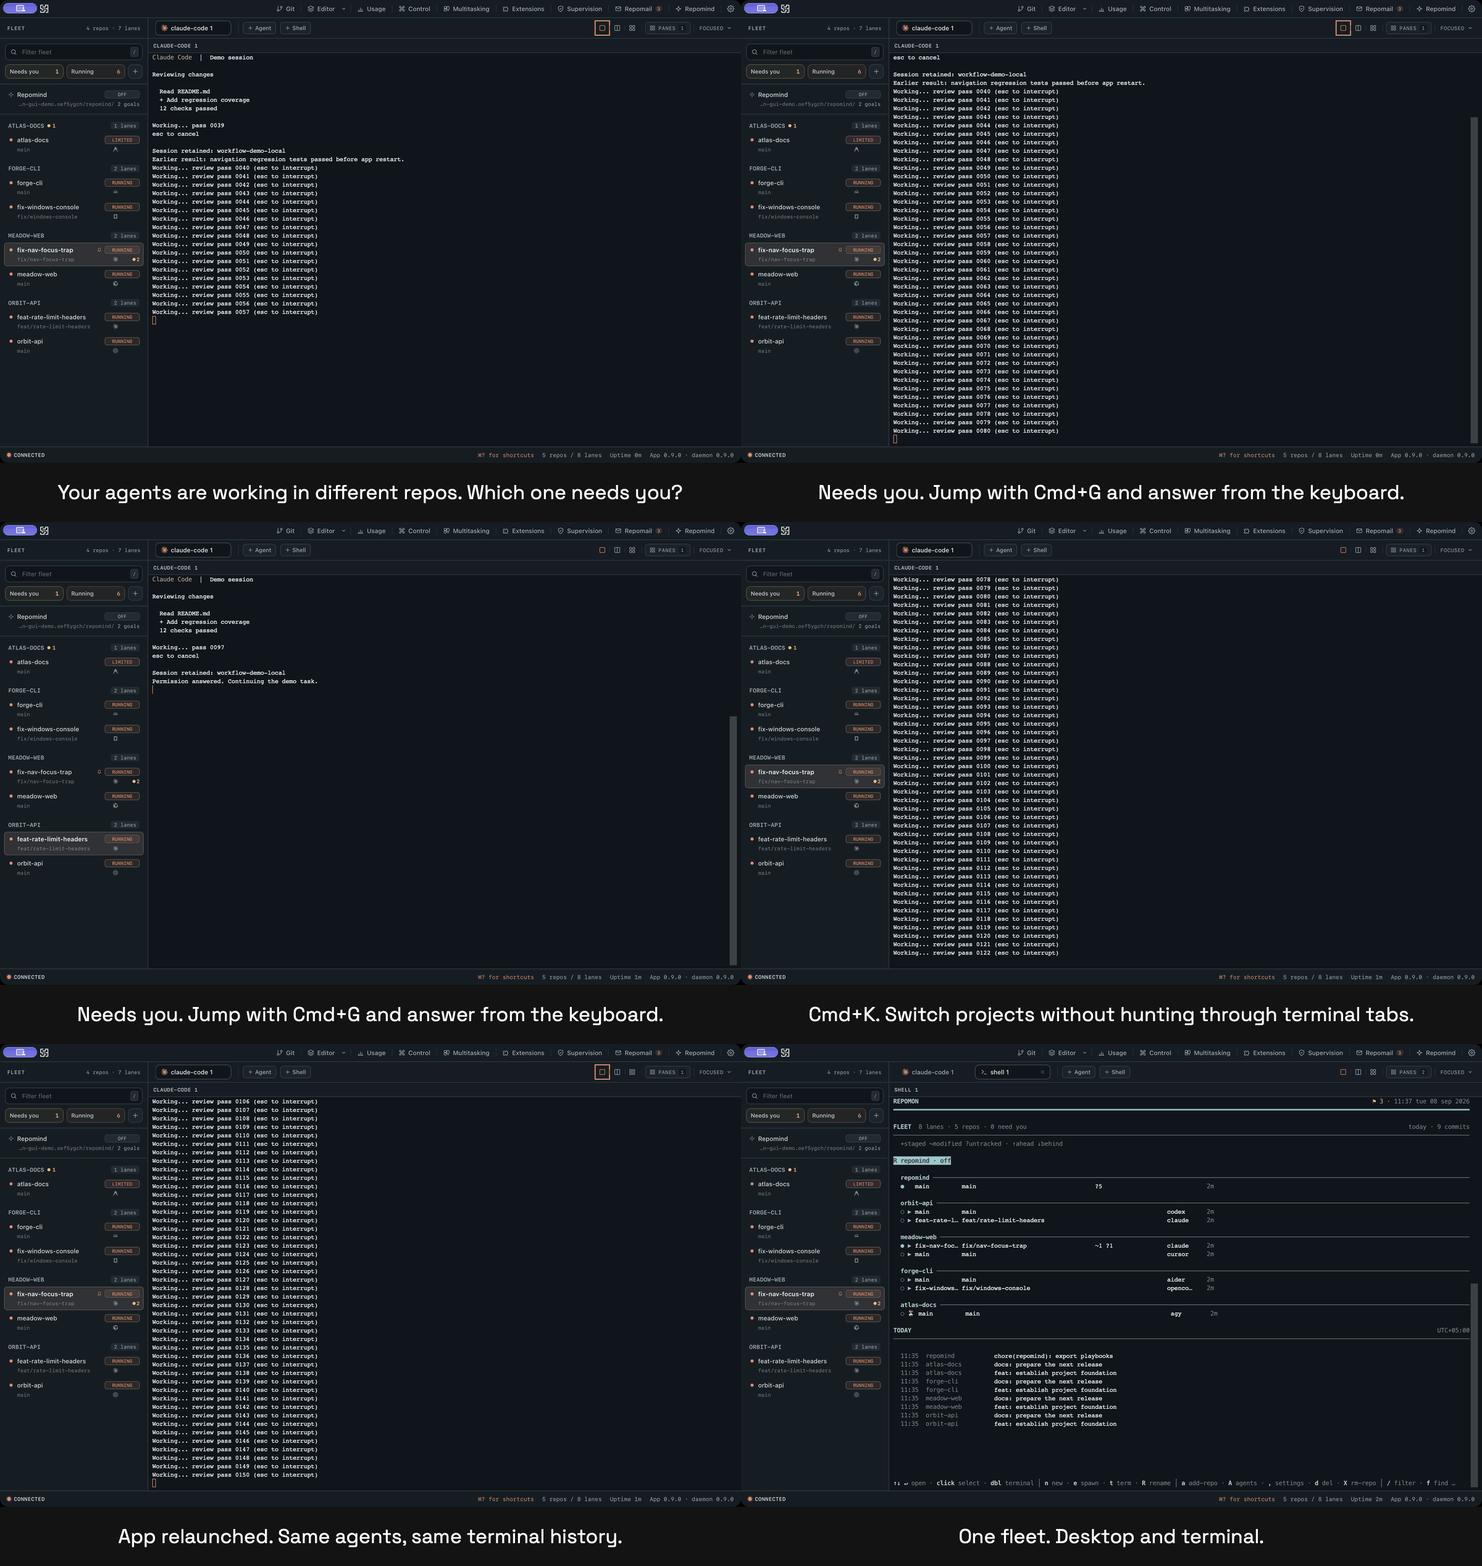
Multiple projects
Choose Repomon when you manage multiple active projects and need one fleet view.
Start with one repository, then add the rest as you need them.
Other tools also manage parallel agents: ccmanager supports multiple projects, Conductor offers cloud workspaces, and Crystal has been replaced by Nimbalyst.
Repomon combines several projects and agent kinds in one local fleet, with desktop and terminal clients.
The desktop app
Follow the first-run system check, then add a repo and choose an installed agent CLI.
The bundle includes the daemon and, on macOS/Linux, portable tmux. Neither needs a separate install.
Settings > System checks Git, agent CLIs and the runtime (tmux on macOS/Linux, ConPTY on Windows), with copyable install commands for missing tools.
Install the bundled CLI from Settings > System > Command-line tools. Extensions manages Claude Code marketplaces, plugins and skills.
Use Cmd for the shortcuts below on macOS, or Ctrl on Windows/Linux. In a focused Windows/Linux terminal, bound Ctrl shortcuts also reach the agent.
Open Home from the sidebar for a board of waiting, running and recently used lanes, with headlines drawn from each agent's last message.
Choose a lane to move straight into its workspace.
Switch an agent pane to Chat for readable conversation history, tool calls, decision prompts and a message composer. Drop files or paste images into a message.
Full turn structure is available for Claude Code, Codex, Antigravity and OpenCode; other agents show the information their transcripts expose. Terminal is always a click away.
Declare a display name and pane accent in repo.json at the repository root. Repomon adopts those defaults when you add the project, preserving a name you have already chosen locally.
v0.10.1 also fixes Japanese, Chinese and Korean composition in Chat and filename fields.
Close and reopen the app or restart the daemon, then reattach with full scrollback.
Agents run in tmux on macOS/Linux or a ConPTY host on Windows. Live processes do not survive an operating-system reboot.
Press Cmd+G to jump to the next lane needing attention.
The sidebar floats waiting lanes and offers activity or manual ordering. Hover a lane to see its live multi-agent roster.
Press Cmd+1 for Git status, working-tree diffs and commit history. Press Cmd+2 for the compact editor.
Open the full Editor workspace for a file tree, multiple tabs, Markdown/SVG previews and project search. If an agent changes an open file, a conflict banner prevents a silent overwrite.
Press Cmd+5 to watch and drive agents across every repo and lane.
The fixed grid labels and color-codes panes by repository and branch.
Press Cmd+8 to mail one agent, a lane or the whole fleet.
Mail between agents, Repomind and you is durable. Inspect per-recipient results; force-send a stuck message or delete it.
Press Cmd+7 to review lane supervision. Enable the global and lane switches to opt in.
Supervision is off by default. Policy can answer routine permission dialogs and nudge stalled agents through a re-verified send path with a per-lane audit. Mail independently wakes eligible idle recipients.
Press Cmd+9 to open Repomind and supervise its work.
The orchestrator uses Repomon’s MCP server to spawn workers, answer their prompts and merge finished work across the fleet. It journals its actions and drafts playbooks for approval. It works today and is still a work in progress.
Press Cmd+3 to inspect tokens and equivalent API cost by session or repo.
Edit model rates in Settings > Usage to re-price history immediately. Toggle today’s sidebar cost there; recount progress shows when older transcripts are still being corrected.
Open Settings > System to install the bundled tools and check their version and your user PATH.
The Windows app has one title bar, native window controls and durable ConPTY sessions.
Pair a client to watch and drive the fleet over the private WebSocket bridge.
The token-gated bridge serves the same JSON-RPC API. Enable it on your Tailscale address and pair a compatible client to watch and answer prompts. The native iOS companion has fleet view, live conversations and an Approve button; it is built and awaits an Apple Developer account before release. Optional push notifications use Apple’s APNs service.
Prefer the terminal?
Run repomon to open the TUI. It uses the same daemon, fleet, lanes and agents as the desktop app; your selection follows you through four zoom levels.
Use Right arrow to zoom in, Escape or Left arrow to zoom out, and Space for the grid.
Every agent on one screen. The ones waiting on you float to the top; hit g to jump to the next.
Fleet sidebar plus the selected agent's live output and an input line. Steer without losing the picture.
Live tiles auto-sized to your window. Watch and nudge several agents at once.
One agent full-screen: full live terminal, input, and controls. Reattach (a) with full scrollback.
Beyond the live views, three dashboards (2/3/4): a per-repo
commit timeline with cross-repo correlations, detected work sessions exportable to
Markdown, and global commit search. With shell integration (repomon shell-init <shell>) enabled, press c on a lane to exit repomon and
cd your shell straight into that worktree.
ccmanager and the built-in claude agents view also span repositories. Repomon combines session durability across app and daemon restarts, mixed agent kinds, and one local fleet shared by desktop and terminal. If you work in a single repository, a single-repo tool may be simpler.
Other parallel-agent tools include Claude Squad, Conductor and Crystal (now Nimbalyst).
Get it
Universal build, Apple silicon and Intel
Download .dmgThe macOS build is not code-signed yet. Follow macOS’s first-launch approval prompts.
x64 installer
Download .exeBinaries are not code-signed yet. If SmartScreen warns, choose More info, then Run anyway.
AppImage, .deb, or .rpm
Download AppImageDebian / Ubuntu .deb · Fedora / RPM
Replace the filename with your downloaded file.
chmod +x ./Repomon_<version>_amd64.AppImage
./Repomon_<version>_amd64.AppImage
For a Debian package:
sudo apt install ./Repomon_<version>_amd64.deb
The bundle carries its own daemon and, on macOS and Linux, its own portable
tmux. Install Git and your chosen agent CLI if the system check reports either missing. Release builds from 0.7.0 onward support in-app updates
(Settings > General > Check for updates).
Current release: v0.10.1, released September 28, 2026. Desktop installers are available in the rolling desktop-preview channel. The standalone CLI is on the latest versioned release.
repomonAlready have the desktop app? Open Settings > System > Command-line tools > Install. The daemon and CLI are bundled. Or install from GitHub below.
repomon --version.$ curl -fsSL https://github.com/AliHamzaAzam/repomon/releases/latest/download/install.sh | sh
$ brew install AliHamzaAzam/tap/repomon
$ irm https://github.com/AliHamzaAzam/repomon/releases/latest/download/install.ps1 | iex
$ cargo install --git https://github.com/AliHamzaAzam/repomon repomon-tui repomon-daemon repomon-host
Prebuilt CLI binaries: macOS, Linux, and Windows (native, no WSL required).
The CLI needs git on every platform and tmux on macOS and Linux.
The desktop bundle includes tmux, but Git is a separate prerequisite. Windows uses the bundled ConPTY host instead of tmux.
Source installs include repomon-host for Windows; it is unused on macOS/Linux.
Install tmux for the standalone macOS/Linux CLI. Choose your package manager below. Check the installed version with tmux -V.
$ brew install tmux$ sudo apt install tmux$ sudo dnf install tmux$ sudo pacman -S tmux